PostgreSQL is an advanced open-source RDBMS renowned for its extraordinary features. It lets us store and manipulate the data in a well-structured manner. One of the significant features of Postgres is its cross-platform compatibility (i.e., platform independent). It is accessible on all OS (including Windows, macOS, Linux, etc.), and that too without any cost.
Arch Linux is a well-known Linux distribution famous for its tremendous features like easy to use, flexible, lightweight, etc. If you are an Arch Linux user and want to install PostgreSQL on it, then this post is dedicated to you.
Installing PostgreSQL(psql) on Arch Linux
To install Postgres on Arch Linux, go through the given steps:
- Update System Repositories
- Install Postgres
- Verify Postgres Installation
Step 1: Update System Repositories
Before proceeding with the Postgres installation make sure your system is up-to-date. For this purpose, run the given command from your system’s terminal:
sudo pacman -Syu

Step 2: Install PostgreSQL
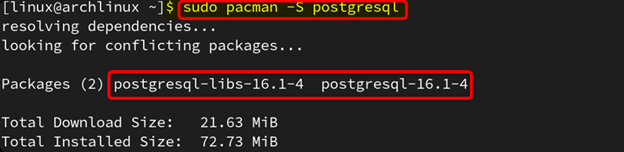
Now execute the following command to install PostgreSQL from the official repository using the Paceman package manager:
sudo pacman -S postgresql
Here, we use the “-S” option which instructs the paceman package manager to synchronize packages (install PostgreSQL from configured repositories):
Step 3: Verify PostgreSQL Installation
To ensure the PostgreSQL installation on Arch Linux, run the below-given command:
postgres --version
The output snippet confirms that the PostgreSQL version “16.1” has been successfully installed on our system:

How to Configure PostgreSQL Server on Arch Linux
Installing the Postgres package is a pre-requisite for configuring the Postgres server on Arch Linux. Once installed, initialize the database cluster to start the service. After this, you can set the super-user password and proceed with different database operations like creation, deletion, etc. To do that, just walk through the given stepwise instructions:
Step 1: Switch to postgres User
First, execute the below command to switch from the Linux user to the postgres:
sudo -iu postgres
The snippet below ensures that we switch to the postgres user:

Step 2: Initialize Data Directory
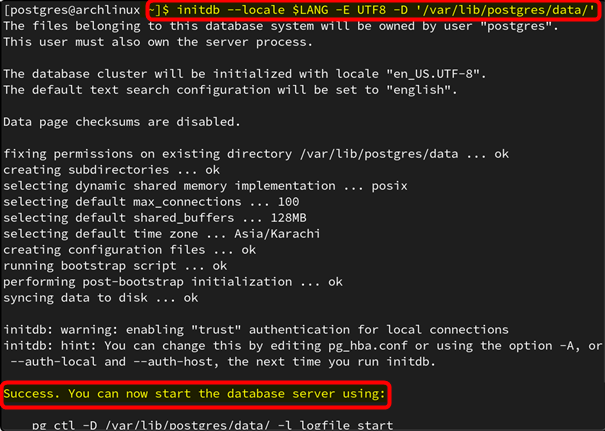
Now execute the following command to initialize a new PostgreSQL database cluster with the specified locale settings, character encoding, and data directory:
initdb --locale $LANG -E UTF8 -D '/var/lib/postgres/data
Step 3: Initialize the Data Directory With Data Checksums
Enabling data checksums in PostgreSQL adds an additional/extra layer of data integrity by verifying the consistency of data at the storage level. To do this, we can use the --data-checksums argument with the above command.
Let’s check if the data checksum is enabled or not by running the below-given command:
psql --tuples-only -c "SHOW data_checksums"
The output shows that the checksum is not enabled yet:

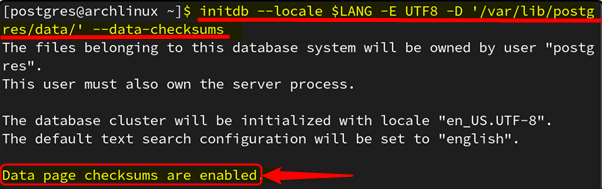
To initialize the data directory with checksum enabled, all you need to do is run the following command:
initdb --locale $LANG -E UTF8 -D '/var/lib/postgres/data/' --data-checksums
The output makes things clear as it clearly states that the checksums are enabled:
How to Enable the PostgreSQL Server on Arch Linux?
To enable the Postgres server on Arch Linux, follow the below-listed steps:
Step 1: Start PostgreSQL Server
Once the data directory is initialized, you need to start the PostgreSQL server to make it operational. To do that, execute the command:
systemctl start postgresql
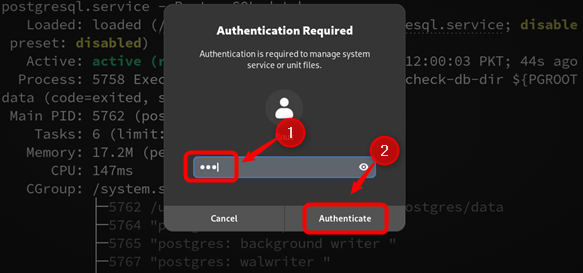
Executing the systemctl command will lead you to the following window. Provide the appropriate password and hit the Authenticate button to proceed:
Step 2: Check PostgreSQL Status
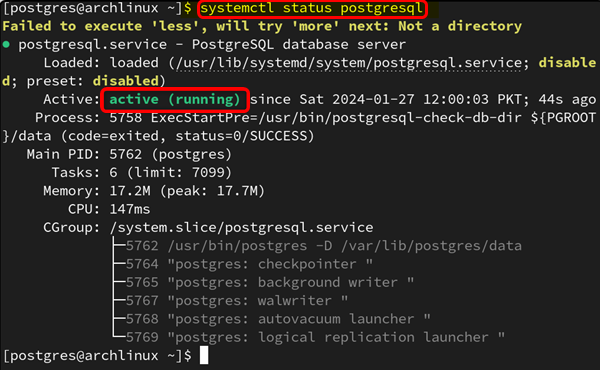
Now execute the below-stated command to check the PostgreSQL status:
systemctl status postgresql
The output snippet depicts that the PostgreSQL is active and running:
Step 3: Enable Postgres
In case PostgreSQL is not enabled, run the systemctl command with the enable argument, as follows:
systemctl enable postgresql

How to Use PostgreSQL Server on Arch Linux
Now we can use the PostgreSQL server on our Arch Linux, for this, access the psql(Postgres interactive terminal) as a postgres user:
sudo -u postgres psql
From the below snippet, you can notice that we have successfully switched to the default Postgres user:

Now you can perform any database operation of your choice using SQL commands like CREATE TABLE, CREATE DATABASE, CREATE USER, DELETE TABLE, DROP TABLE, etc.
How to Uninstall Postgres From Arch Linux
If PostgreSQL is not required anymore, you can remove/uninstall it from your Arch Linux to free up some space. For this purpose, run the below command:
sudo pacman -Rcns postgresql
On successful execution, Postgres will be completely uninstalled from your system along with its config files and dependencies.
Final Thoughts
PostgreSQL is an advanced open-source database system that allows users to enter SQL queries and immediately view the results. Anyone can install it easily on any operating system (since it is platform-independent). We can install Postgres(psql) on the Arch system using the default Pacman package manager tool.
Once you have installed PostgreSQL, set it up by configuring the hostname, port, and database you want to connect to. When setting up the PostgreSQL server, ensure to enable data checksums to enhance data integrity and modify the authentication methods for both local and remote connections.
This guide has illustrated all the necessary steps to install, setup, and uninstall PostgreSQL on Arch Linux.